


Actually, Brownie is one of the most popular frameworks to create smart contracts, alongside truffle and hardhat.
Brownie offers a lot of cool things and functionalities you can use to make your development process more simple.
So, whether you're starting your journey as a blockchain developer, or you already have experience with smart contract development in Javascript but you want to shift to python, this tutorial is for you.
We’ll walk through and explore all the main areas of functionality and I'll give you some tricks you can use to make your development process more easy.
Let's start!
How to install brownie
There are two easy ways in which you can install brownie:
1. By using pipx
pipx is just a like pip, but you can install those packages and run it directly in the command line
Is focused on installing and managing Python packages that can be run from the command line directly as applications.
Whereas
pipis a general-purpose package installer for both libraries and apps with no environment isolation.pipxis made specifically for application installation, as it adds isolation yet still makes the apps available in your shell:pipxcreates an isolated environment for each application and its associated packages.
From the pipx documentation.
That means, you don't have to create a python virtual environment when a package needed it.
I recommend using this method, if so,you just can follow along the tutorial in the brownie documentation here.
2. Using the common python pip
To be able to install brownie without pipx, you first need to create a virtual environment.
A virtual environment in python is a contained environment for separate projects on your computer 🐍. What this means is that you can have separate virtual environments with separate versions of python and python packages for each of your projects.
You can create one just by typing:
$ python3 -m venv <path + name of your virtual environment>
Example:
$ python -m venv ./myVirtualEnviroment
After the creation process is done, you will need to activate the virtual environment:
$ source myVirtualEnviroment/bin/activate
Or
$ source myVirtualEnviroment/Scripts/activate
And then, you just need to write:
$ pip install eth-brownie
With that you'll be able to use brownie.
Take into account that this only will work in the current directory, if you change from directory you will need to create and activate a virtual environment again. Also, if you close your current session of the command line and you want to work with the project again you will need to activate the virtual environment again.
To make sure that everything works fine, in both scenarios, write
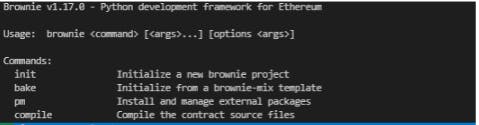
$ brownie
If you need more information about the installation process of Brownie, you can follow this tutorial made by Ben Hauser on Medium
Also, you can follow the brownie documentation
Brownie basics
I'm not going to dive deep into the basics of brownie, for that the brownie team wrote an excellent documentation that you can check here.
Also, you can read these greats tutorial made by Ben Hauser, tutorial one, tutorial two.
I'm just going to make you a resume:
Initialized templates for projects, so you don't have to start from scratch.
$ brownie bake <name of the template>Compile your contracts
$ brownie compileWrite test for your contracts. Writing the test in the
testfolder and typing$ brownie testCan also interact with the contract using scripts or via the brownie console.
In the
scriptsfolder you can write your scripts to interact with the contract programmatically, and then you write:$ brownie run scriptsOr, using the console you can interact with the contract manually.
$ brownie consoleDeploy your contracts in a controlled environment (using ganache under the hood)
$ brownie deployAnd also deploy to a testnet or a real net
$ brownie deploy --network <name of the network>You also can do this when you are testing your contracts.
$ brownie test --network <name of the network>Or runing your scripts
$ brownie run scripts --network <name of the network>if you need any extra information about a brownie CLI command you can always type:
`$ brownie --help
The brownie config file
This is a special file that brownie always looks for to grab information when you are going to build, test and deploy your contract…
This file allows you to modify Brownie’s default behaviors and also add new sections that can be useful for you when you are working in your smart contract.
I'm not going to deep dive in all the sections that the file have, you could see those in the brownie documentation.
I'm just going to explain some things that could be useful for you.
You need to add this file to the root of your project and name it brownie-config.yaml
One of the things you can do is:
Remapping import paths.
Let's say that your contract need to use some functionality from other contract, like a template or a library (the safe math library or the ERC721 standard template of Open Zeppelin for example)
You can do that without copying the contract interface to your project, you can just pull the source code from the npm package that hosts the code.
Example, let's said that you need to import the Open Zeppelin contract Ownable.
For this you'll need to install the open zeppelin npm package, but with remappings you don't need it.
Just import the package as usual in your solidity file.
import "@openzeppelin/contracts/ownership/Ownable.sol";
And then, in your brownie-config.yaml file, you can use one of it's default sections called compiler to change it's behavior.
In this section you add a subsection called
solc.And in this subsection you add another subsection called
remappings.
You should have something like this:
compiler: solc: remappings:
Each value under remappings is a string in the format of prefix=path.
A remapping instructs the compiler to search for a given prefix at a specific path.
For example:
github.com/ethereum/dapp-bin/=/usr/local/li..
This remapping instructs the compiler to search for anything starting with github.com/ethereum/dapp-bin/ under /usr/local/lib/dapp-bin.
Brownie automatically ensures that all remapped paths are allowed.
And now, if we want to use our Open Zeppelin ownable contract, we just need to follow that prefix=path format.
By having a prefix
@openzeppelin
And then, having the path that rute us to the open zeppelin package in NPM, that is usually stored on GitHub.
We can obtain that searching by googling open zeppelin ownable contract
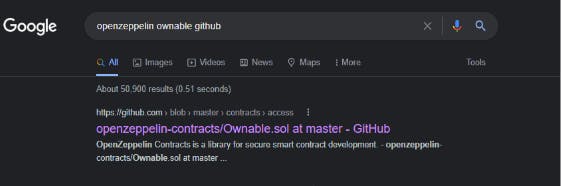
And we can use this information to make the path, should be wrote in this format: <organization/repo>@
First, we need to add the organization, that means the username who create the repo. In this case:
OpenZeppelin
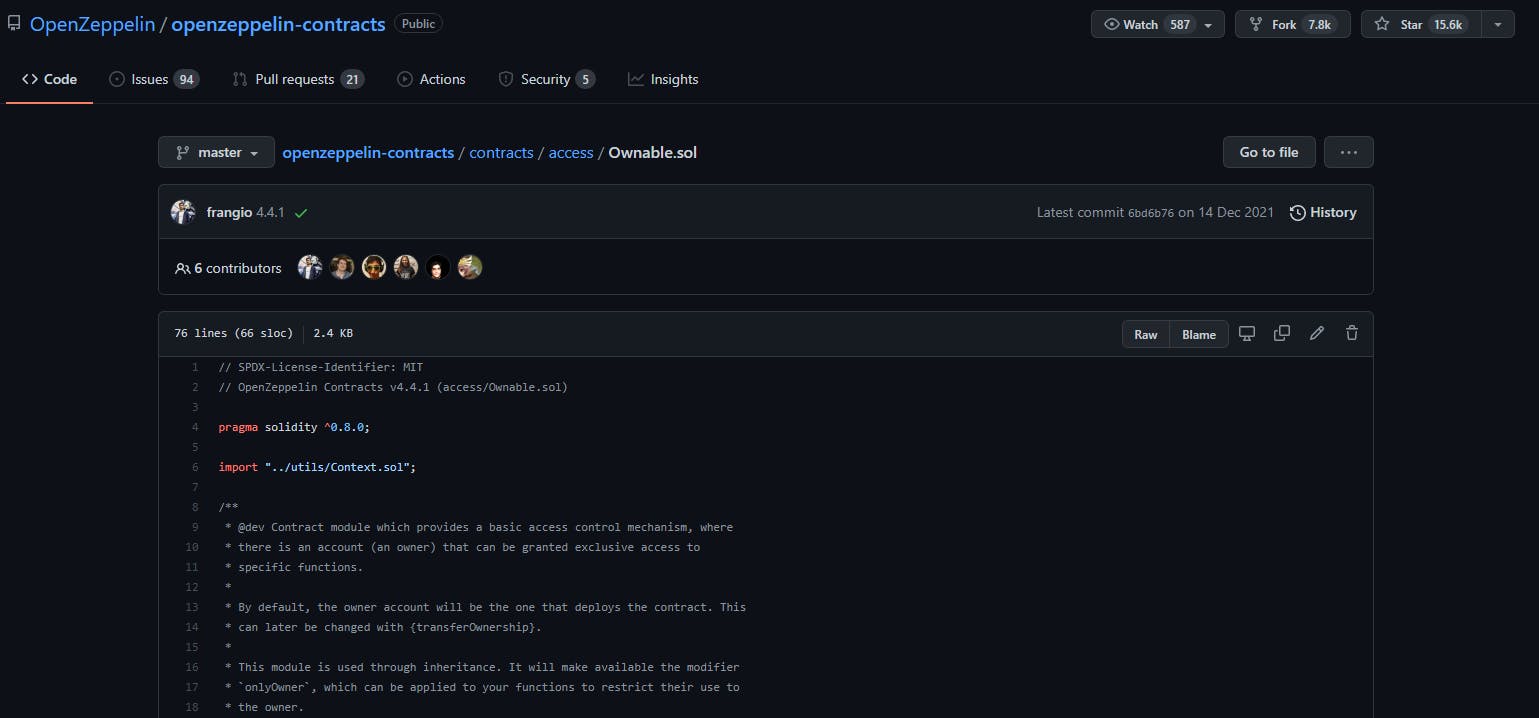
Then we need to add the github repo in which is store the code. In this case
openzeppelin-contracts
We would have something like this for the path
OpenZeppelin/openzeppelin-contracts
And finally, we need to add the package version we want to work with.
In the root of the repo we can see all the releases (the versions).
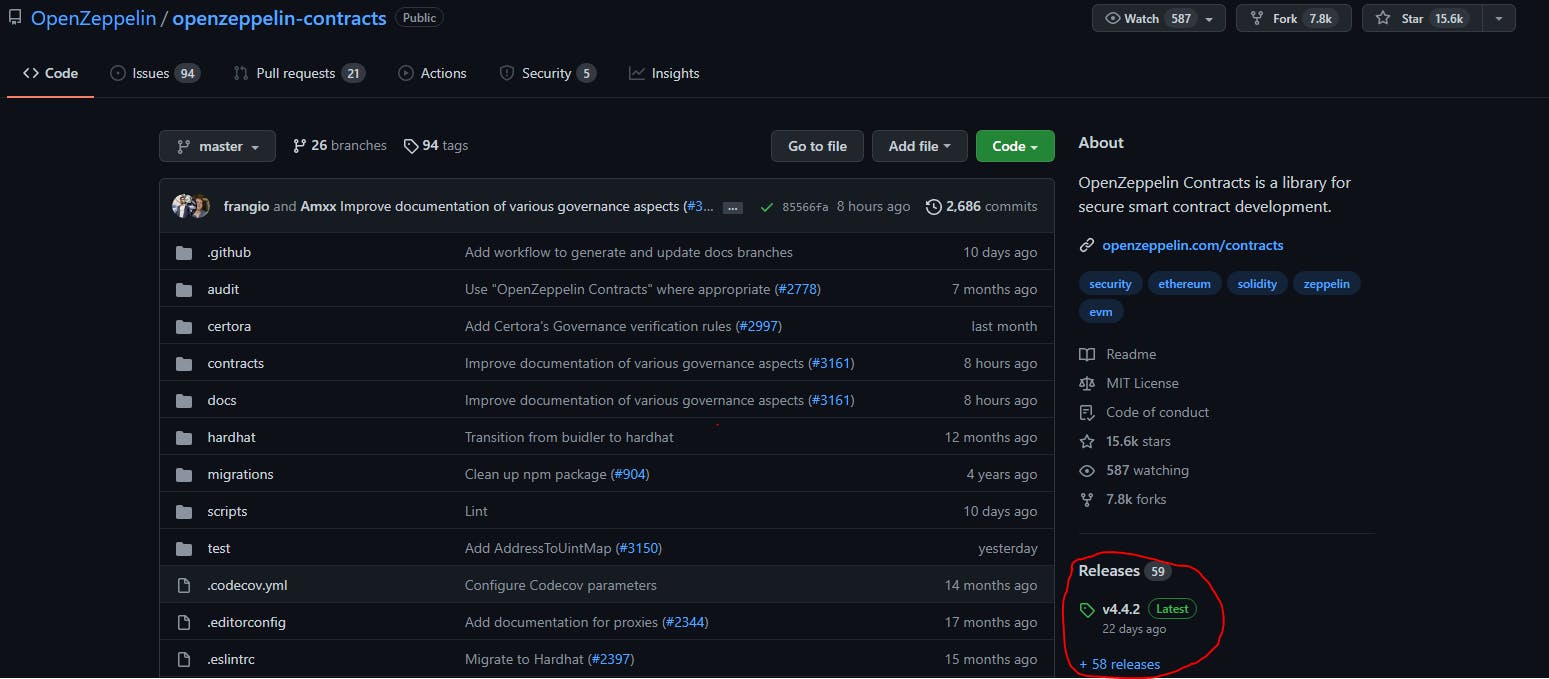
By pressing in releases you can see all the different versions you can use, this is going to depend mostly of the specifications of the project you are working on, but you can really chose whatever you want.
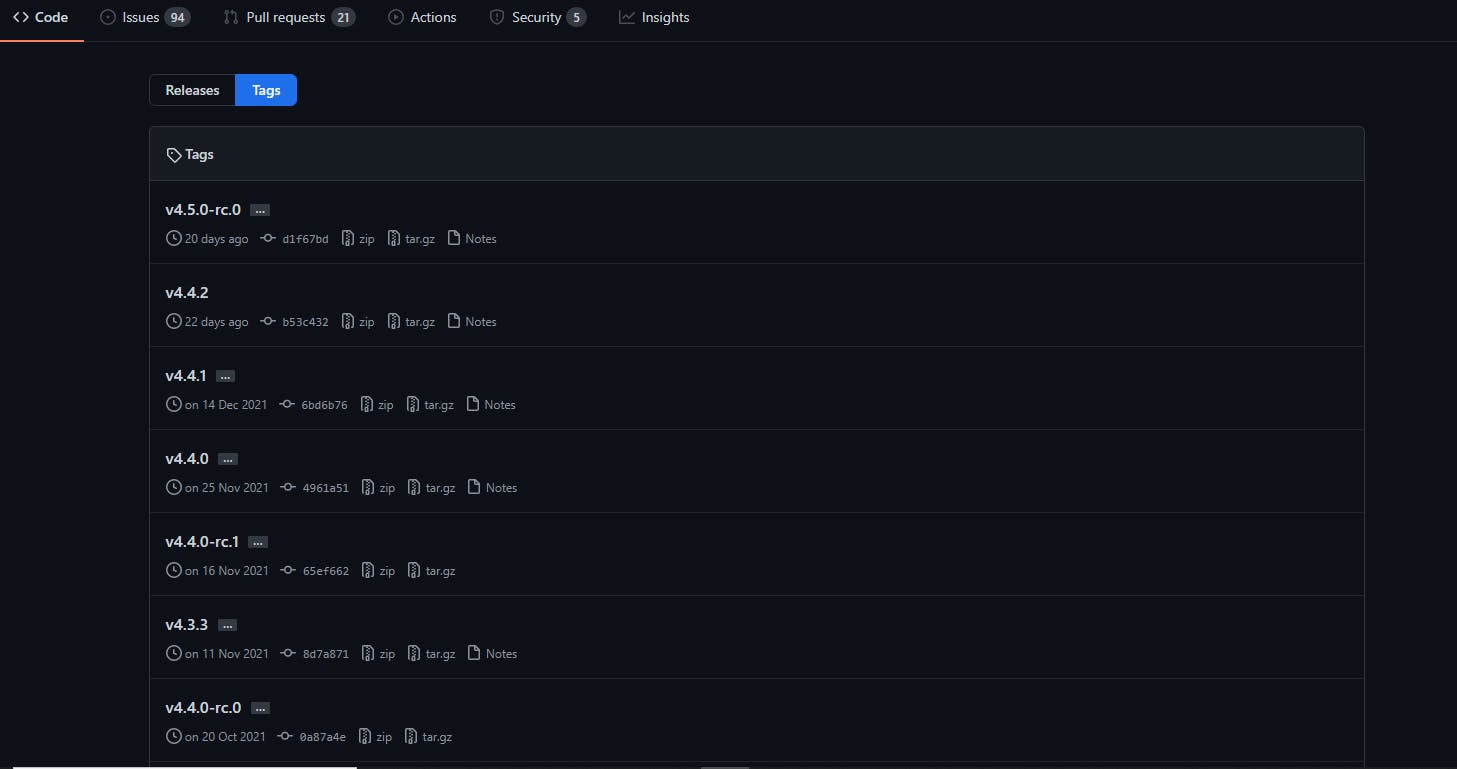
You need to add the version by adding an “@” at the beginning.
Example
Working with version 4.4.1:
OpenZeppelin/openzeppelin-contracts@4.4.1Or version 4.3.1
OpenZeppelin/openzeppelin-contracts@4.3.1
That's it, now in your remappings section you should have something like this:
compiler: solc: remappings: - '@openzeppelin=OpenZeppelin/openzeppelin-contracts@4.3.1'
Now, everytime the compiler see @openzeppelin in your solidity code, will search that import under the OpenZeppelin/openzeppelin-contracts@4.3.1 github repo, so you don't need to install anything.
So, with this:
import "@openzeppelin/contracts/ownership/Ownable.sol";
The compiler will search in the contract folder of that repo, then in the ownership folder and then grab the Ownable.sol file and download it for you.
Awesome, right? Well, you can do this with whatever file you want, using the prefix to tell the compiler “hey! If you see this (prefix) search it under this folder (the path)"
Adding the dependencies section.
To complete this, you can also add the dependencies section to the brownie config file. This section will tell brownie to install any listed dependencies prior to compiling a project. That could be useful when someone else download/clone your project from GitHub.
You just need to add the path of your remap to that dependencies section.
dependencies:
  - OpenZeppelin/openzeppelin-contracts@4.3.1
compiler:
  solc:
    remappings:
      - '@openzeppelin=OpenZeppelin/openzeppelin-contracts@4.3.1'
This will create a dependency folder under the build/contracts folder. There, the artifacts of every dependencies that a contract need will be stored.
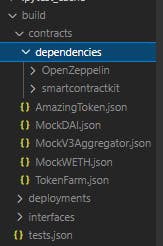
The build/contracts folder is where all the artifacts of the projects are stored.
If you don't know, the artifacts are the result of the compiled contract, with all the objects that we can interact with, like the bytecode of the contract, the ABI, the address…
If you want to read more about the build folder you can check the brownie documentation
Adding new sections to grab information from.
The brownie config file allows you to add new custom sections that you can use to store persistent data that you could use all across your project. You can do this in two different ways:
Adding a simple section
You just add a new section, you can call it whatever you want. Let's say you want to store your private key for deploy the contracts.
my_accounts: my_private_key: 'my_super_secret_private_key'
I add the section my_accounts and inside that section a my_private_key subsection and in that I store my private key.
Also I could add more subsections to that section to store more data, example:
my_accounts: my_private_key: 'my_super_secret_private_key' my_public_key: '0x02Ba39E868bF5140e572830C019c36843860B627' my_usename: 'kevinsito'
And even you could add a subsection inside a subsection, thats on you and whatever you want to do.
And, you just can grab that information for use it in your scripts or your test files by using the brownie config object.
You just need to import it
from brownie import config
my_private_key = config["my_accounts"]["my_private_key"]
The first, is the section, and the second is the subsection that we are searching.
When you use it you will obtain the data that you store in your brownie config file under tat section.
Example
from Brownie import config
my_private_key = config["my_accounts"]["my_private_key"]
print(my_private_key)
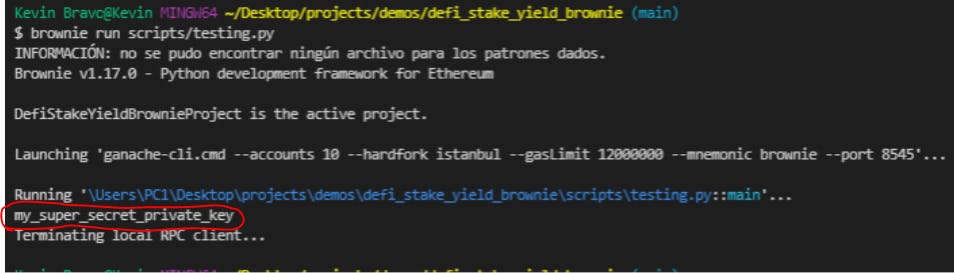
Obviously, you don't want to store your private key in that way, it is too dangerous… Later in the article I will teach you how you can store in a more secure way.
You can literally do this with whatever section you want to grab information from, not only with those you created.
Adding a section to grab information conditionally.
You can also store information in the brownie config file, and grab it conditionally. For example:
Let's say you only want to grab certain data when you are on the rinkeby network, and other data when you are on the kovan network. That could be a contract address.
**You could do that! **
Imagine your project needs to interact with a Chainlink contract, and you want to test it in all the different networks, but the address of that contract change depending on the network.
So, you could add an address for the kovan network and another for the rinkeby network inside your brownie config file, and depending on the network you are deploying or testing your contract, one of those networks would be selected
The brownie config file has a section in which you can modify all the networks default behavior, the networks section. You could read more about all the specifications of the network section here.
Let's do it!
networks: kovan: my_chainlink_contract_address: 'ths_is_my_chainlink_address_in_kovan' rinkeby: my_chainlink_contract_address: 'this_is_my_chainlink_address_in_rinkeby'
And now, we can grab that information in our scripts or our test again by using the config object of brownie, and specifying the section we want to grab information from.
from brownie import config
contract_addresss=config["networks"]
But now, how do we do this work depending on the network we are working?
We can see what is the current network working with the brownie object network and using its function network.show_active()
This will tell us what is the current active network.
contract_address = config["networks"][network.show_active()]
And then, you need to add the name of the subsection that you created in the correspondent network, should be the same name between the networks.
contract_address = config["networks"][network.show_active()]["my_chainlink_contract_address"]
print(contract_address)
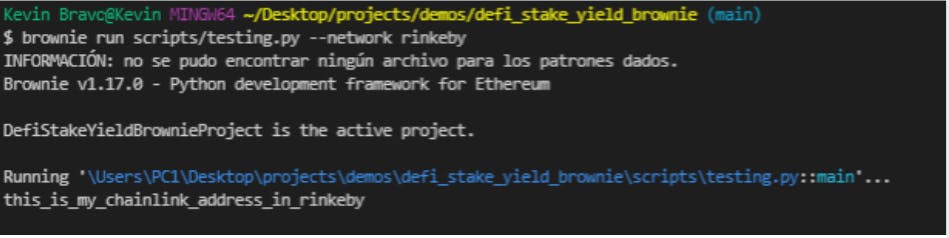
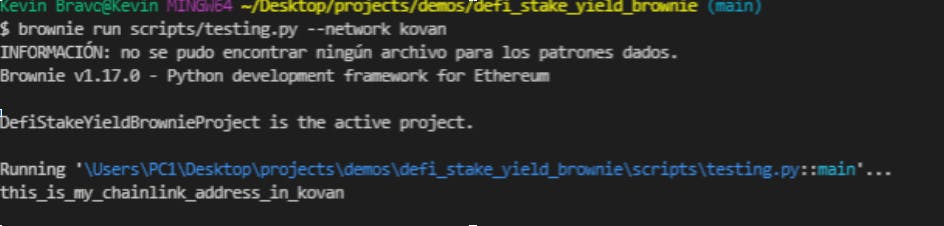
Let's test it.
$ brownie run scripts/testing.py --network rinkeby
Now using kovan.
$ brownie run scripts/testing.py --network kovan
The flag --network is used when we want to change to which network the contract would be deployed,* this is going to be the development network by default* (which is a ganache cli), you can read more about that here
Okay but, how brownie knows how to change between networks by just typing its name?, well brownie have an object called network, **in which there stores a lot of different networks that we can use to deploy and test our contract. ** We will see more about that later in the article.
Using environment variables
When you are working with smart contracts, there are certain data that you don't want the general public to know. Like your private key, some API key, like your alchemy or infura API key.
To store that sensitive data we have a file called .env which is a file used to store environment variables and is not uploaded to Github.
Lets create a .env file in the root of our project.
In this .env file we can store sensitive data in variables, that we can use in other parts of the project, in a very secure way.
Example:
export MY_PRIVATE_KEY= <some_private_key>
We need to add the “export” keyword and the begining so brownie knows that variable can be used.
And now, you can use that data in your scripts or test file, you just need to import the os module
import os
my_private_key = os.getenv(“MY_PRIVATE_KEY”)
And by using the .getenv method and passing the id of your environment variable as a parameter you can use that information in your files.
Brownie by default writes in the .gitignore file .env to avoid that file been uploaded to github (you really don't want that)
But you can check the .gitignore file anyways to be sure that include.env
We also can use the environment variables in the brownie-config.yaml file
Let's say you want to store a private key to be able to grab it in your scrips. You can just type:
my_private key: ${MY_PRIVATE_KEY}
To be able to do that, you need to specify a new section in your brownie config file
dotenv: .env
With this we are saying to brownie “hey, I want to use the .env file as a file to store my environment variables, and whenever you see this strange character ${} in our brownie config file that's going to be an environmental variable that you can grab from the .env file.
With that we can use our private key in a more secure way!.
And if you want to use the environment variables in your .env file in all your project, you can do it by setting the environment variables using.
source .env
This will allow you yo use all the environment variables in your command line
*This is my .env file *

You can test this by typing:
echo $name_of_your_env_variable

Working with networks
As I said earlier, you can use brownie to deploy your contract to a local or live networks.
You have two options here, you can use the development environment, which is a local, temporary network used for testing and debugging, is generating from Ganache.
Or you can use a live environment, a real blockchain. Could be a testnet or a real one.
Brownie have a special object called network that contains all the different default networks that we can use to deploy our contract.
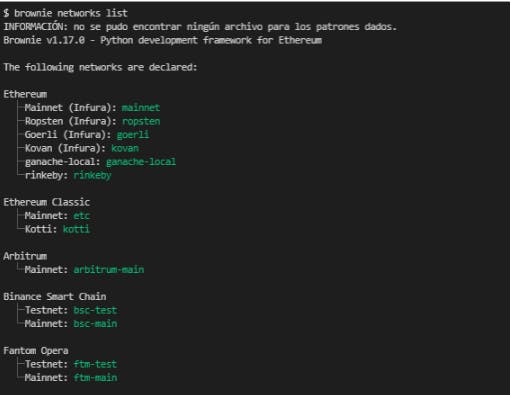
We can see all the networks that we have in brownie by typing:
$ brownie networks list
This will show us all the different networks that we can use to deploy and test our contracts…
We can see a more detailed list by adding "true"
$ brownie networks list true
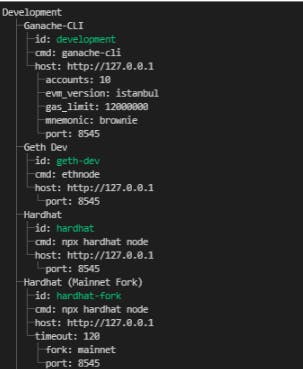
With this, you can see all the different options that the network object have.
And you can add new networks.
$ brownie networks add [environment] [id] host=[host] [KEY=VALUE, ...]
Network elements
environment: the category that the network should be placed in, e.g. “Ethereum”, “Ethereum Classic”, or “Development”
id: a unique identifier for the network, e.g. “mainnet”
host: the address of the node to connect to, e.g. mainnet.infura.io/v3/1234567890abcdef
port: The port to connect to. If not given as a unique field, it should be included within the host path.
accounts: The number of funded, unlocked accounts. Default 10.
mnemonic: A mnemonic to use when generating local accounts.
fork: If given, the local client will fork from another currently running Ethereum client. The value may be an HTTP location and port of the other client, e.g. localhost:8545, or the ID of a production network, e.g. mainnet.
explorer: the block explorer of that especific network.
If you are going to constantly use a network for deploying your project, and you don't want to add everytime the --network flag you can set up the network that brownie is going to use by default adding this section in your brownie config file.
networks: default: ropsten
So the default network that brownie is going to use to deploy your contracts is going to be ropsten.
Of course, you can change that behavior in specific occations when you are deploying your contract.
$ brownie run scripts/deploy.py --network rinkeby
In this case the contract would be deployed on the rinkeby network, although the default network is ropsten.
If you want to learn more about networks, you can read the brownie documentation
Adding forked network
Let me teach you how you can add a forked network: e That means, when you want to test your smart contract you can literally grab a exact copy of the current ethereum mainnet and paste it for your personal use, so all the contracts that are in the mainnet you can use it in your project for testing without deploying mocks.
$ brownie networks add development my-super_mainnet-fork host=http://127.0.0.1 fork=http//:eth-mainnnet.alchemyapi/v2/ accounts=10 mnemonic=brownie port=8585
Deleting an existing network.
If you want to delete a default network or a network you created, you just have to type:
$ brownie networks delete <id_of_the_network>
Remember you can know the id of all the networks by typing:
$ brownie networks list true
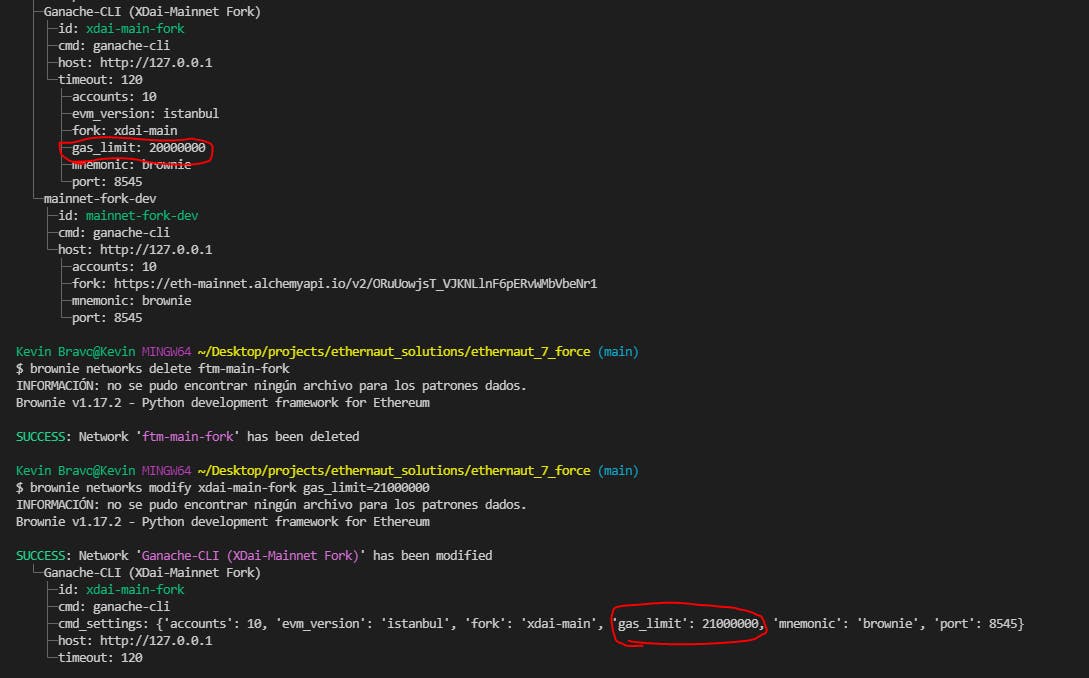
$ brownie networks delete <ftm-main-fork>

Updating an existing network.
If you want to change some value of a network, but without rewriting the entire network, you just need to type:
$ brownie networks modify <id_of_the_network> key=value
Example: Let's say you want to change the gas limit of the xdai network
You just look for the network id and the element of the network you want to change and type:
$ brownie networks modify xdai-main-fork gas_limit=210000000
Remember not write when defining the key pair
Good: gas_lilmit=210000000 bad: gas_limit = 210000000
If you want to see more information about networks in the CLI you can always type:
$ brownie networks --help
Working with accounts.
Brownie has a special object that allows us to interact with accounts (EOA) with this we can query a balance or send ether from a specific account.
For development purposes, brownie by default give us 10 accounts with false ether that we can use to test our smart contract in our ganache blockchain.
Brownie also allow us to add accounts from our private key to the list of account in the brownie environment.
You can see your list of accounts by typing:
$ brownie accounts list
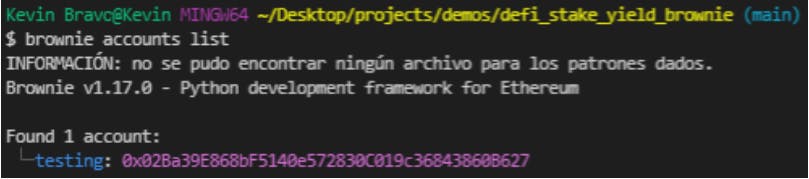
You probably wouldn't have any account because first you need to add it.
You can add an account in the list by using:
$ brownie accounts generate
This will generate a random private key, and make the account available as .
Brownie will ask you to choose a password to encrypt this account, so it is safe.
Also, you can import an account using its private key:
$ brownie accounts new
You will be asked to input the private key, and to choose a password. The account will then be available as .
You can see all the different method for manage account in brownie here
But wait, this is not dangerous? Could everyone see my private key? Don't worry, browne encrypts your private key, so when you want to use that account brownie will ask you for your password to send transactions.
To access those accounts in your scripts, you just need to import the account object from brownie.
You can use the fake accounts that brownie generates.
from brownie import accounts
my_account_1 = accounts[0] my_account_2 = accounts[1] my_account_3 =accounts[9]
Or, you can load one of your accounts in your accounts list by using:
from brownie import accounts
my_personal_account = accounts.load(id)
You provide the id of the account, and when sending the transactions brownie will ask you for the password of that account.
Also you can import the account by using the private key of the account directly, using the add method.
accounts.add(‘my private_key’)
You can mix this method, using the .env file. There you can store your private key, so you ensure it is not going to be uploaded to github.
And then, in your brownie config file you can add a new section to store your private key using the name of that environment variable.
(remember you need to set the section”dotenv” to points to the .env file” so you can use environment variables in your brownie config file in that format)
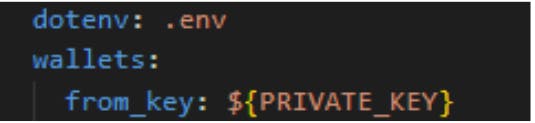
And then, you grab your account using the conifg and accounts object
from brownie import config, account
my_account_from_private_key = accounts.add(config["wallets"]["from_key"])
You can read more about how to work with accounts here.
Function entry point.
This is something to take into account when you are writing your scripts.
Brownie looks for a function called main() as an entry point to run your scripts, so if that function does not exist, you will get an error like this

You can read more about that here.
Verify your contracts on Etherscan automatically
You can verify all the contract source code programmatically using brownie, tis really easy.
First, you need to create a Etherscan account
Its like every registration process
Then, you need to create an API key to be able to interact with the Etherscan API.
In the nav bar, go to your profile and click in API keys.
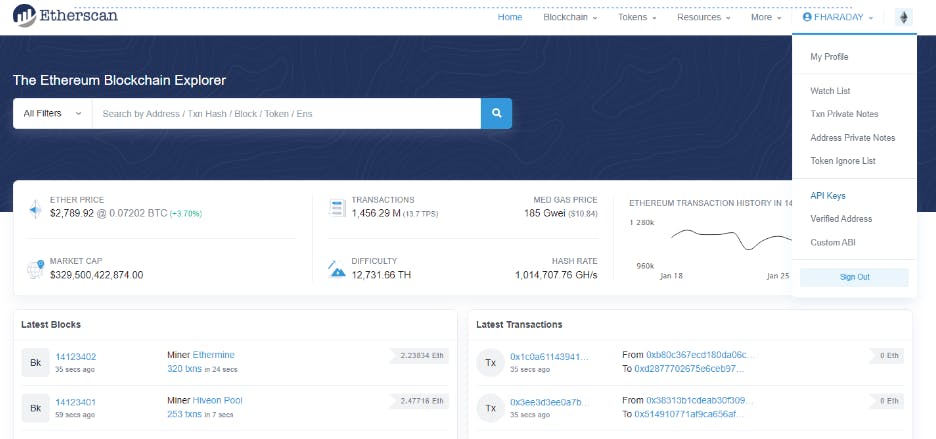
Finally, you just need to add a new API key

Add that private key in your .env file under.
export ETHERSCAN_TOKEN=<my_etherscan_token>
And for automatically verification you just need to add the argument publish_source=True to the deploy function
from brownie import MyContractToken, accounts, config

my_account =  accounts.add(config["wallets"]["from_key"])

MyContractToken.deploy("My Contract Token", "CLT", 18, 1e28, {'from': my_account}, publish_source=True)
And you just need to run your deploy script.
$ brownie run scripts/deploy.py --network rinkeby
Ta da! Your contract is already verified on Etherscan!
It is even possible to verify contracts that you deployed earlier, as long as you didn’t change any of the code. This is done with:
MyContractToken.publish_source(deployed_contract)
You can read more about that here.
Verifying contracts on other blockchains.
Let's say you want to verify your contract on polygon, or BSC, or Fantom or whatever EVM Based chain.
The process is basically the same, you just need to go to the block explorer of that chain
Create an account and create an API key that you have to paste in your .env file.
If you get lost, follow the above tutorial using etherscan, as I said, the process is the same for most of the block explorers out there.
For name that env variable you have to take the name of the block explorer + “_” + “TOKEN”
Example, let's say you have your polygon scan API,
The env variable should be
export POLYGONSCAN_TOKEN=<your_token>
For know the name of a specific explorer in the in the brownie convention, use the list of accounts and look for the
explorerkey pair the see its name
But, how does Brownie know it has to use Etherscan or any other block explorer to verify the contract?
Well, remember the networks object, in where we have a lot of networks to work with and all the especific elements that a network have.
live:
  - name: Ethereum
    networks:
      - name: Ropsten (Infura)
        chainid: 3
        id: ropsten
        host: https://mainnet.infura.io/v3/$WEB3_INFURA_PROJECT_ID
        explorer: https://api-ropsten.etherscan.io/api
In that object there is a explorer section that allow us to set the explorer to see the transactions.
Brownie will knows that you would use the explorer that is under that section to verified your contracts, and also give the links to be able to verify the transactions.
That's all folks.
I hope this article was helpful for you.
If you have any comment or suggestions, please leave it in the comments section.
You can follow me on twitter @kevbto and DM me, I’m always happy to talk and know more people in this amazing community.